Locker Material Study
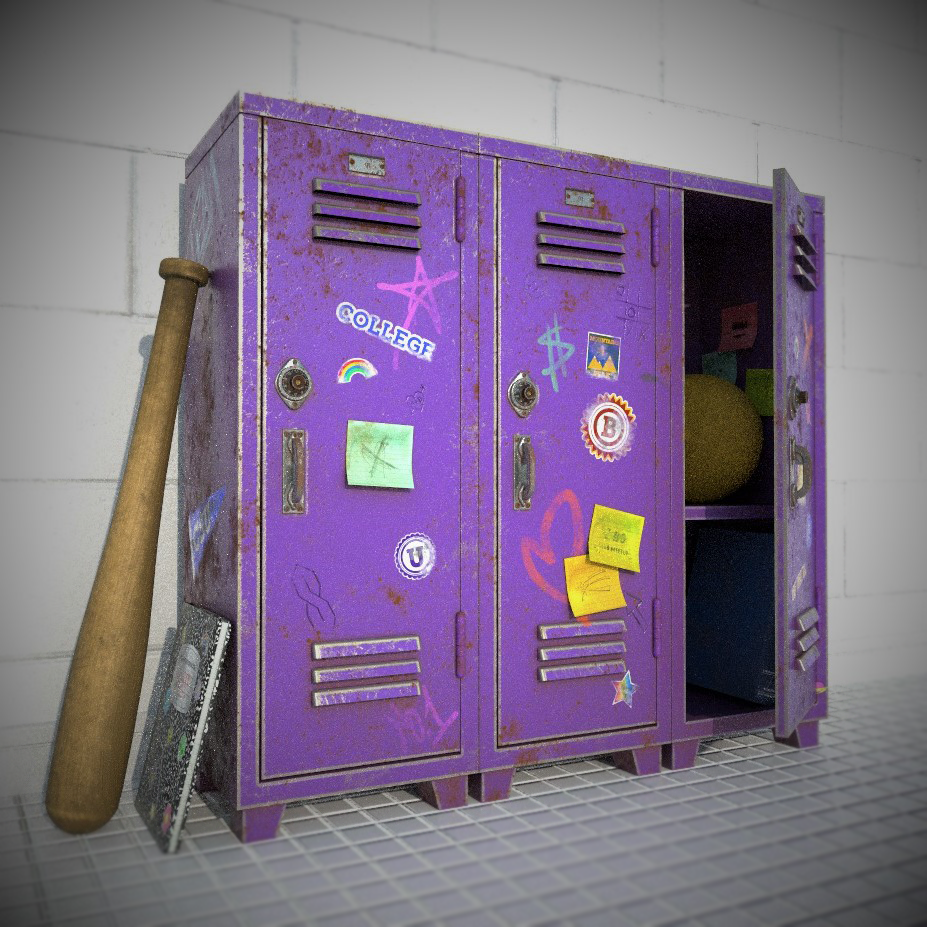
As a 3D generalist studying motion design, I am always looking for new techniques to add to my practice. Over the past few months I have been learning how to improve my work using game design pipeline approaches. This locker material study is a culmination of some of the new skills I have learned in my GAME 722 Real-Time Materials and Shaders course at SCAD. For this project, I created and UV’d my models in Maya, created base materials in Substance Designer, applied those materials in Substance Painter, and rendered out the final scene in Unreal. The goal of this project was to study the decomposition of man-made materials. I chose a locker scene so that I could explore a variety of materials: metal, rubber, manufactured wood, paper, concrete, and tile. I thought it would be fun to explore a locker because I could experiment with not only decomposition and wear of the materials, but also the defacement that happens with these sort of school supplies as they get continuous use. I created ‘new’ and ‘old’ versions of the scene to show that change over time. The following is a process breakdown of how I achieved my final results. This breakdown can also be accessed as PDF using the button below.
References
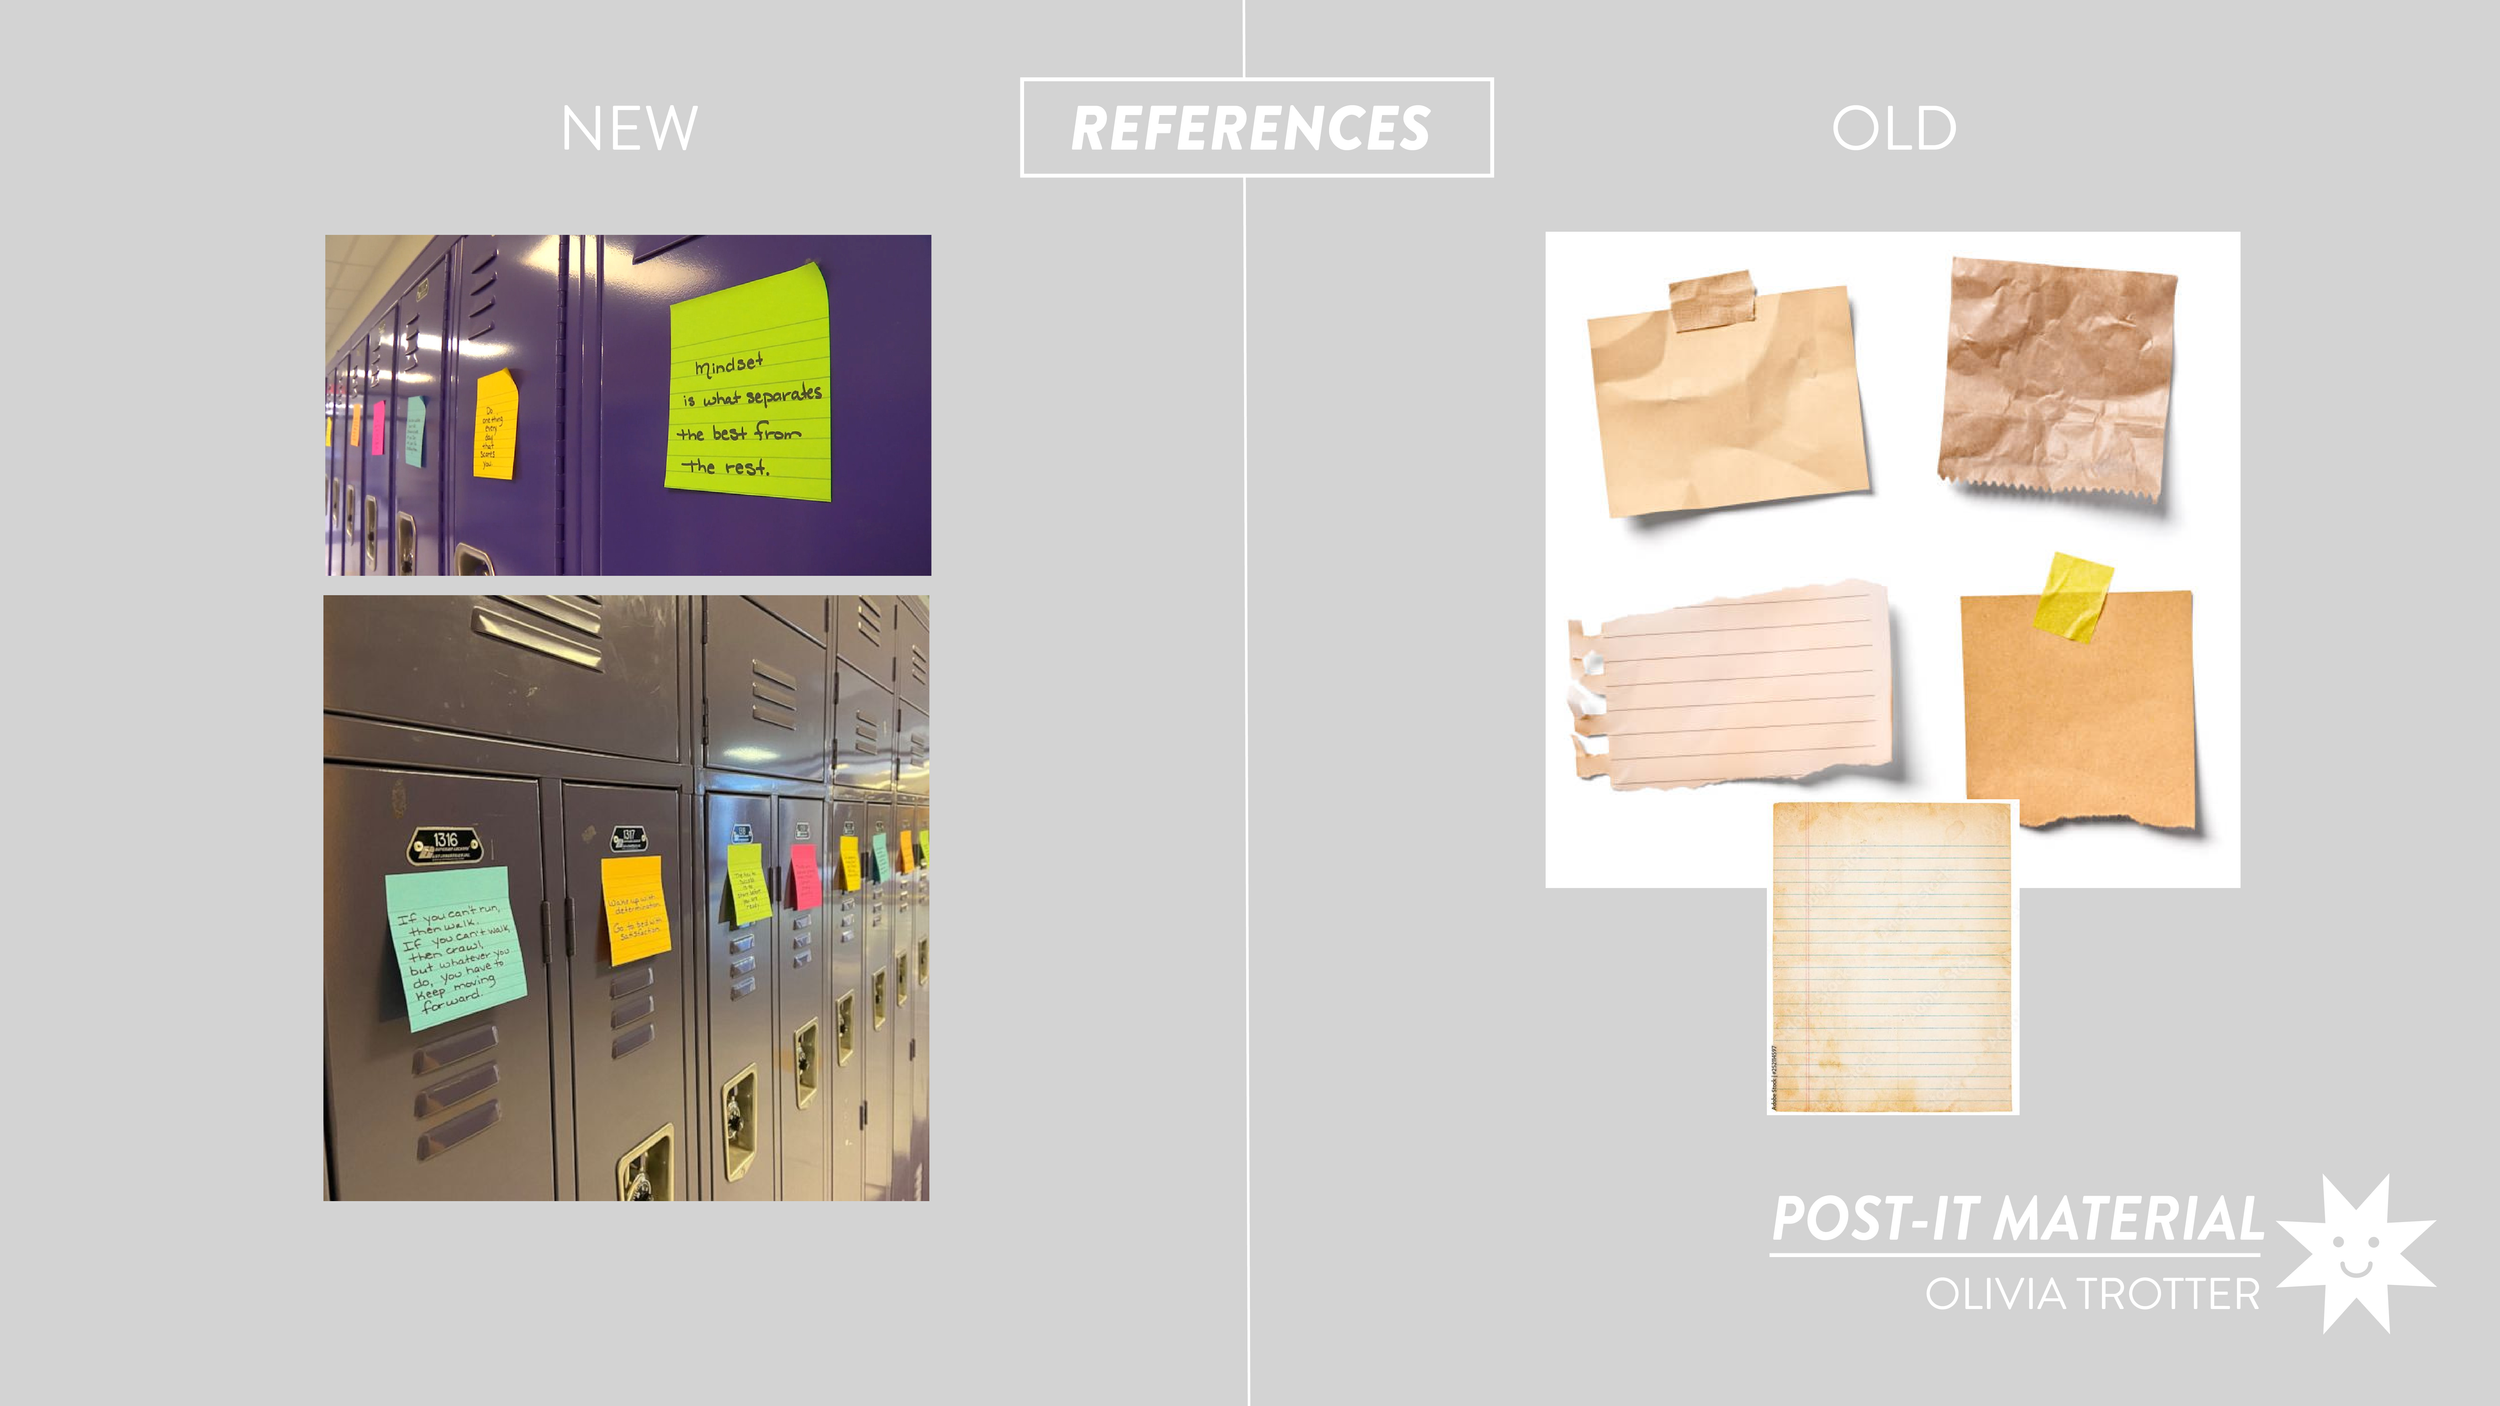
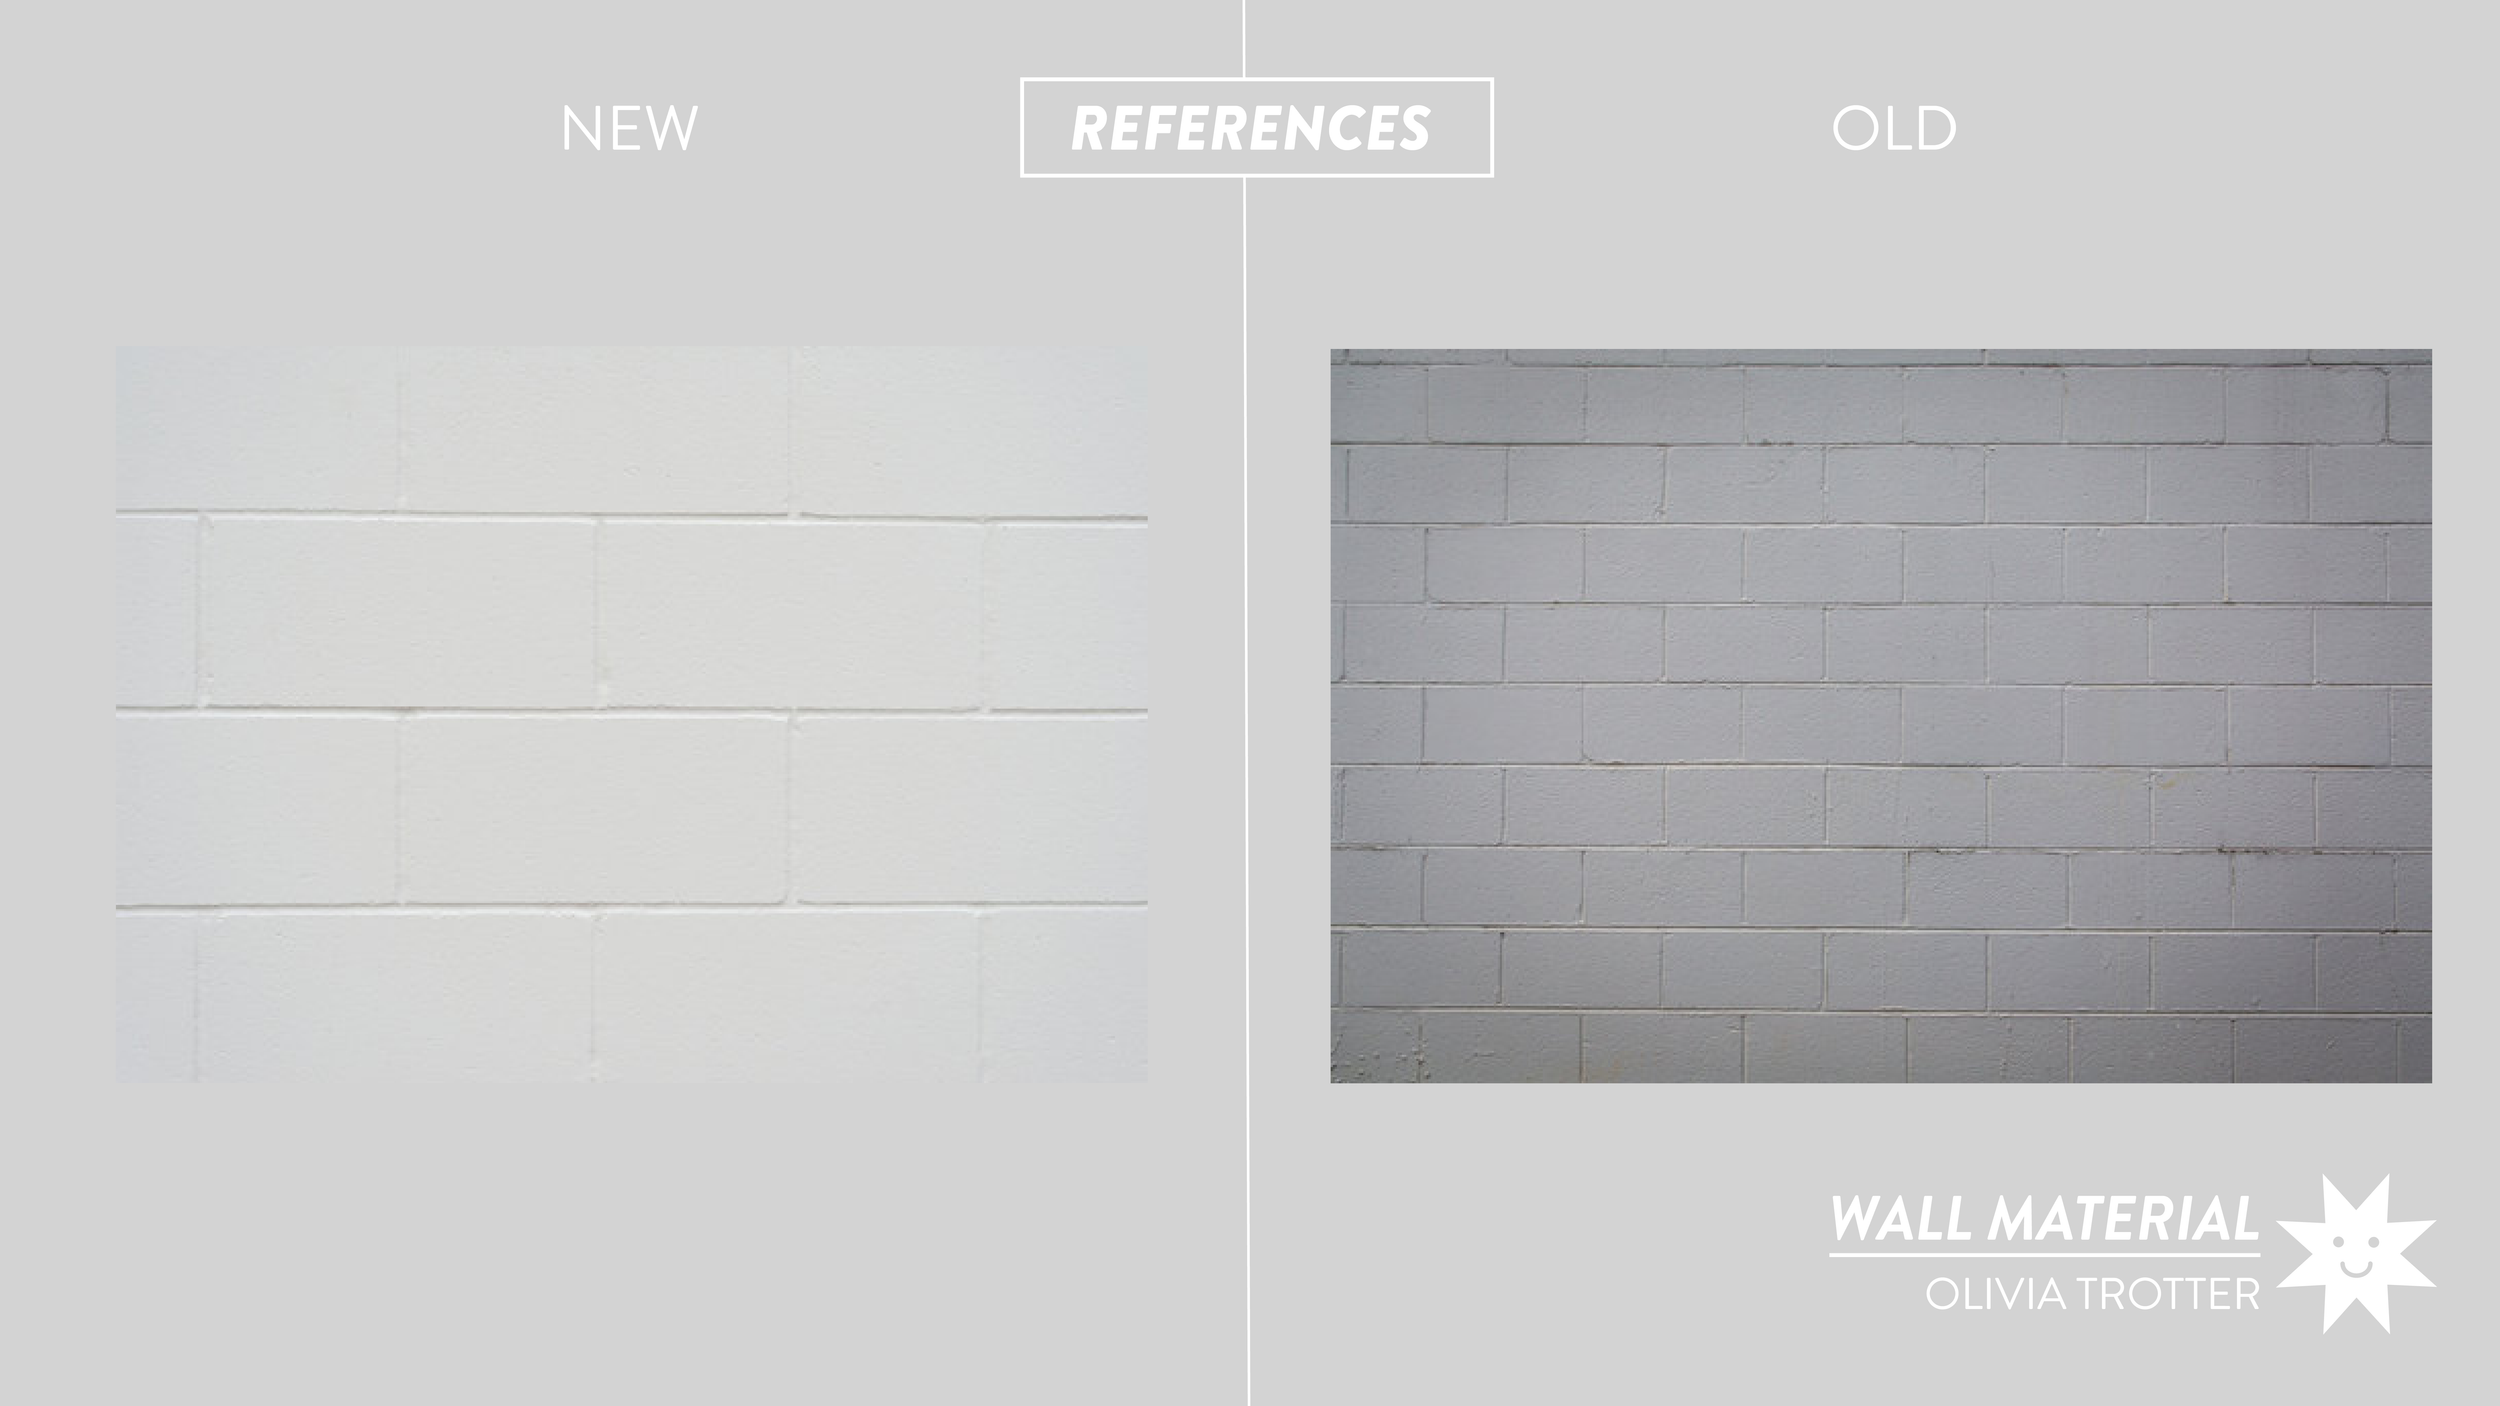
The first step in this process was collecting my references. When I began this process I was also looking at a lot of pictures of school hallways and locker rooms to see what sort of objects tend to occupy those spaces. I chose to make all assets myself for this project so when I was selecting references I made sure to find images that informed both the modeling and texturing aspects of the project. Finding specific references for both the shapes and textures of my objects also helped me to get an idea of what my scene would look like when all assets were assembled together.



Model Development
After I had a good starting point for the look and feel of the assets I needed to create, the next step in the process was developing my models in Maya. Since these were half-sized lockers that would normally be stacked, adding other props was key in making the scale of the lockers legible and making the scene feel more believable and lived-in. Although I could have simply added another stacked layer to give a sense of scale, showing a close-up shot of just a few lockers helped me to focus on adding details.
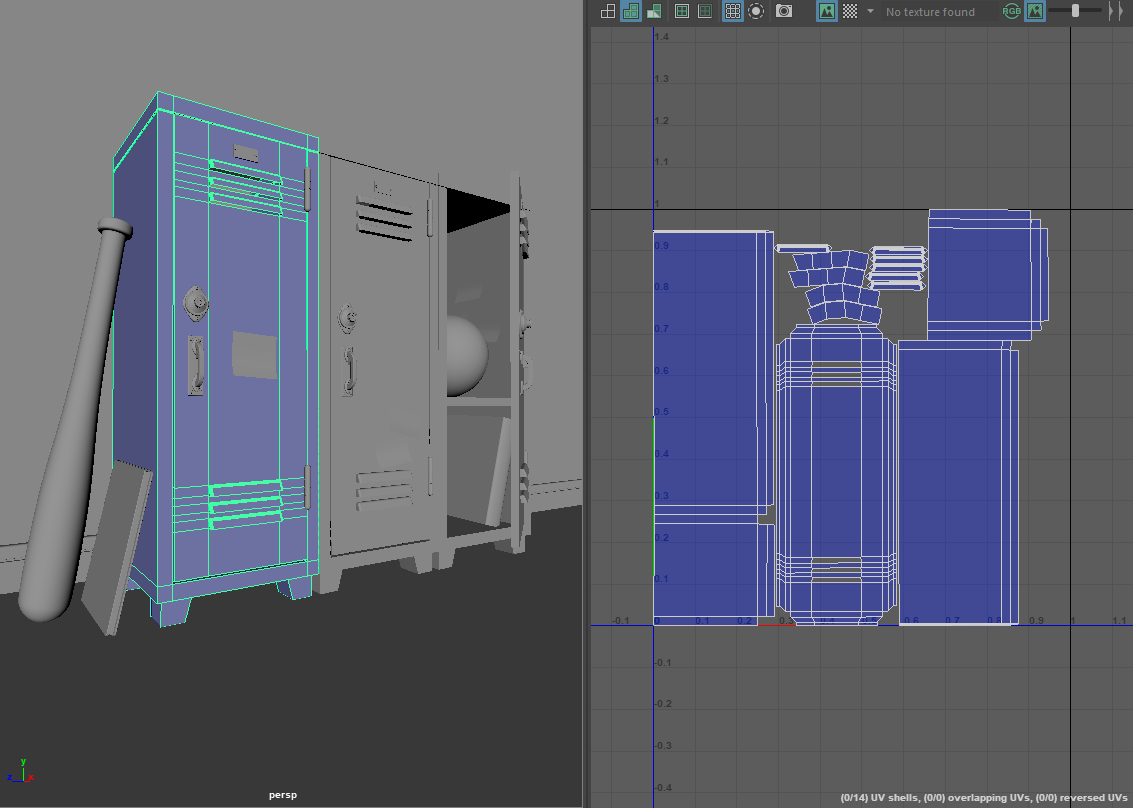
After models were developed, I moved on to creating UVs. This was a relatively quick process especially since many of my meshes were duplicates of each other. However, even though I had many duplicates I had to consider separate levels of detail I wanted to achieve. Instead of stacking my UV layouts on objects like the lockers and post-it notes, I separated them so I could customize the level of wear on each material which helped to make them look like they were not exact copies.
Material Development
Before making my worn-down materials, I created the ‘new’ looking version which helped to make a clean base material for everything else to build off of. Each of these materials were created in Substance Designer using PBR Metallic Roughness outputs. All materials were made procedurally so that scale and tiling could be adjusted easily in Substance Painter. Parameters were also created for outputs like color, normal intensity, and roughness to give a higher degree of control in Painter. Below are breakdowns of each material’s final maps and Designer nodes.
Ball Material: This material was created mainly using the tile generator and shape nodes to create and mask the weave lines. There is a similar weave node that is native to Designer, but I decided to build my weave pattern from scratch in order to match my material to my reference as closely as possible.
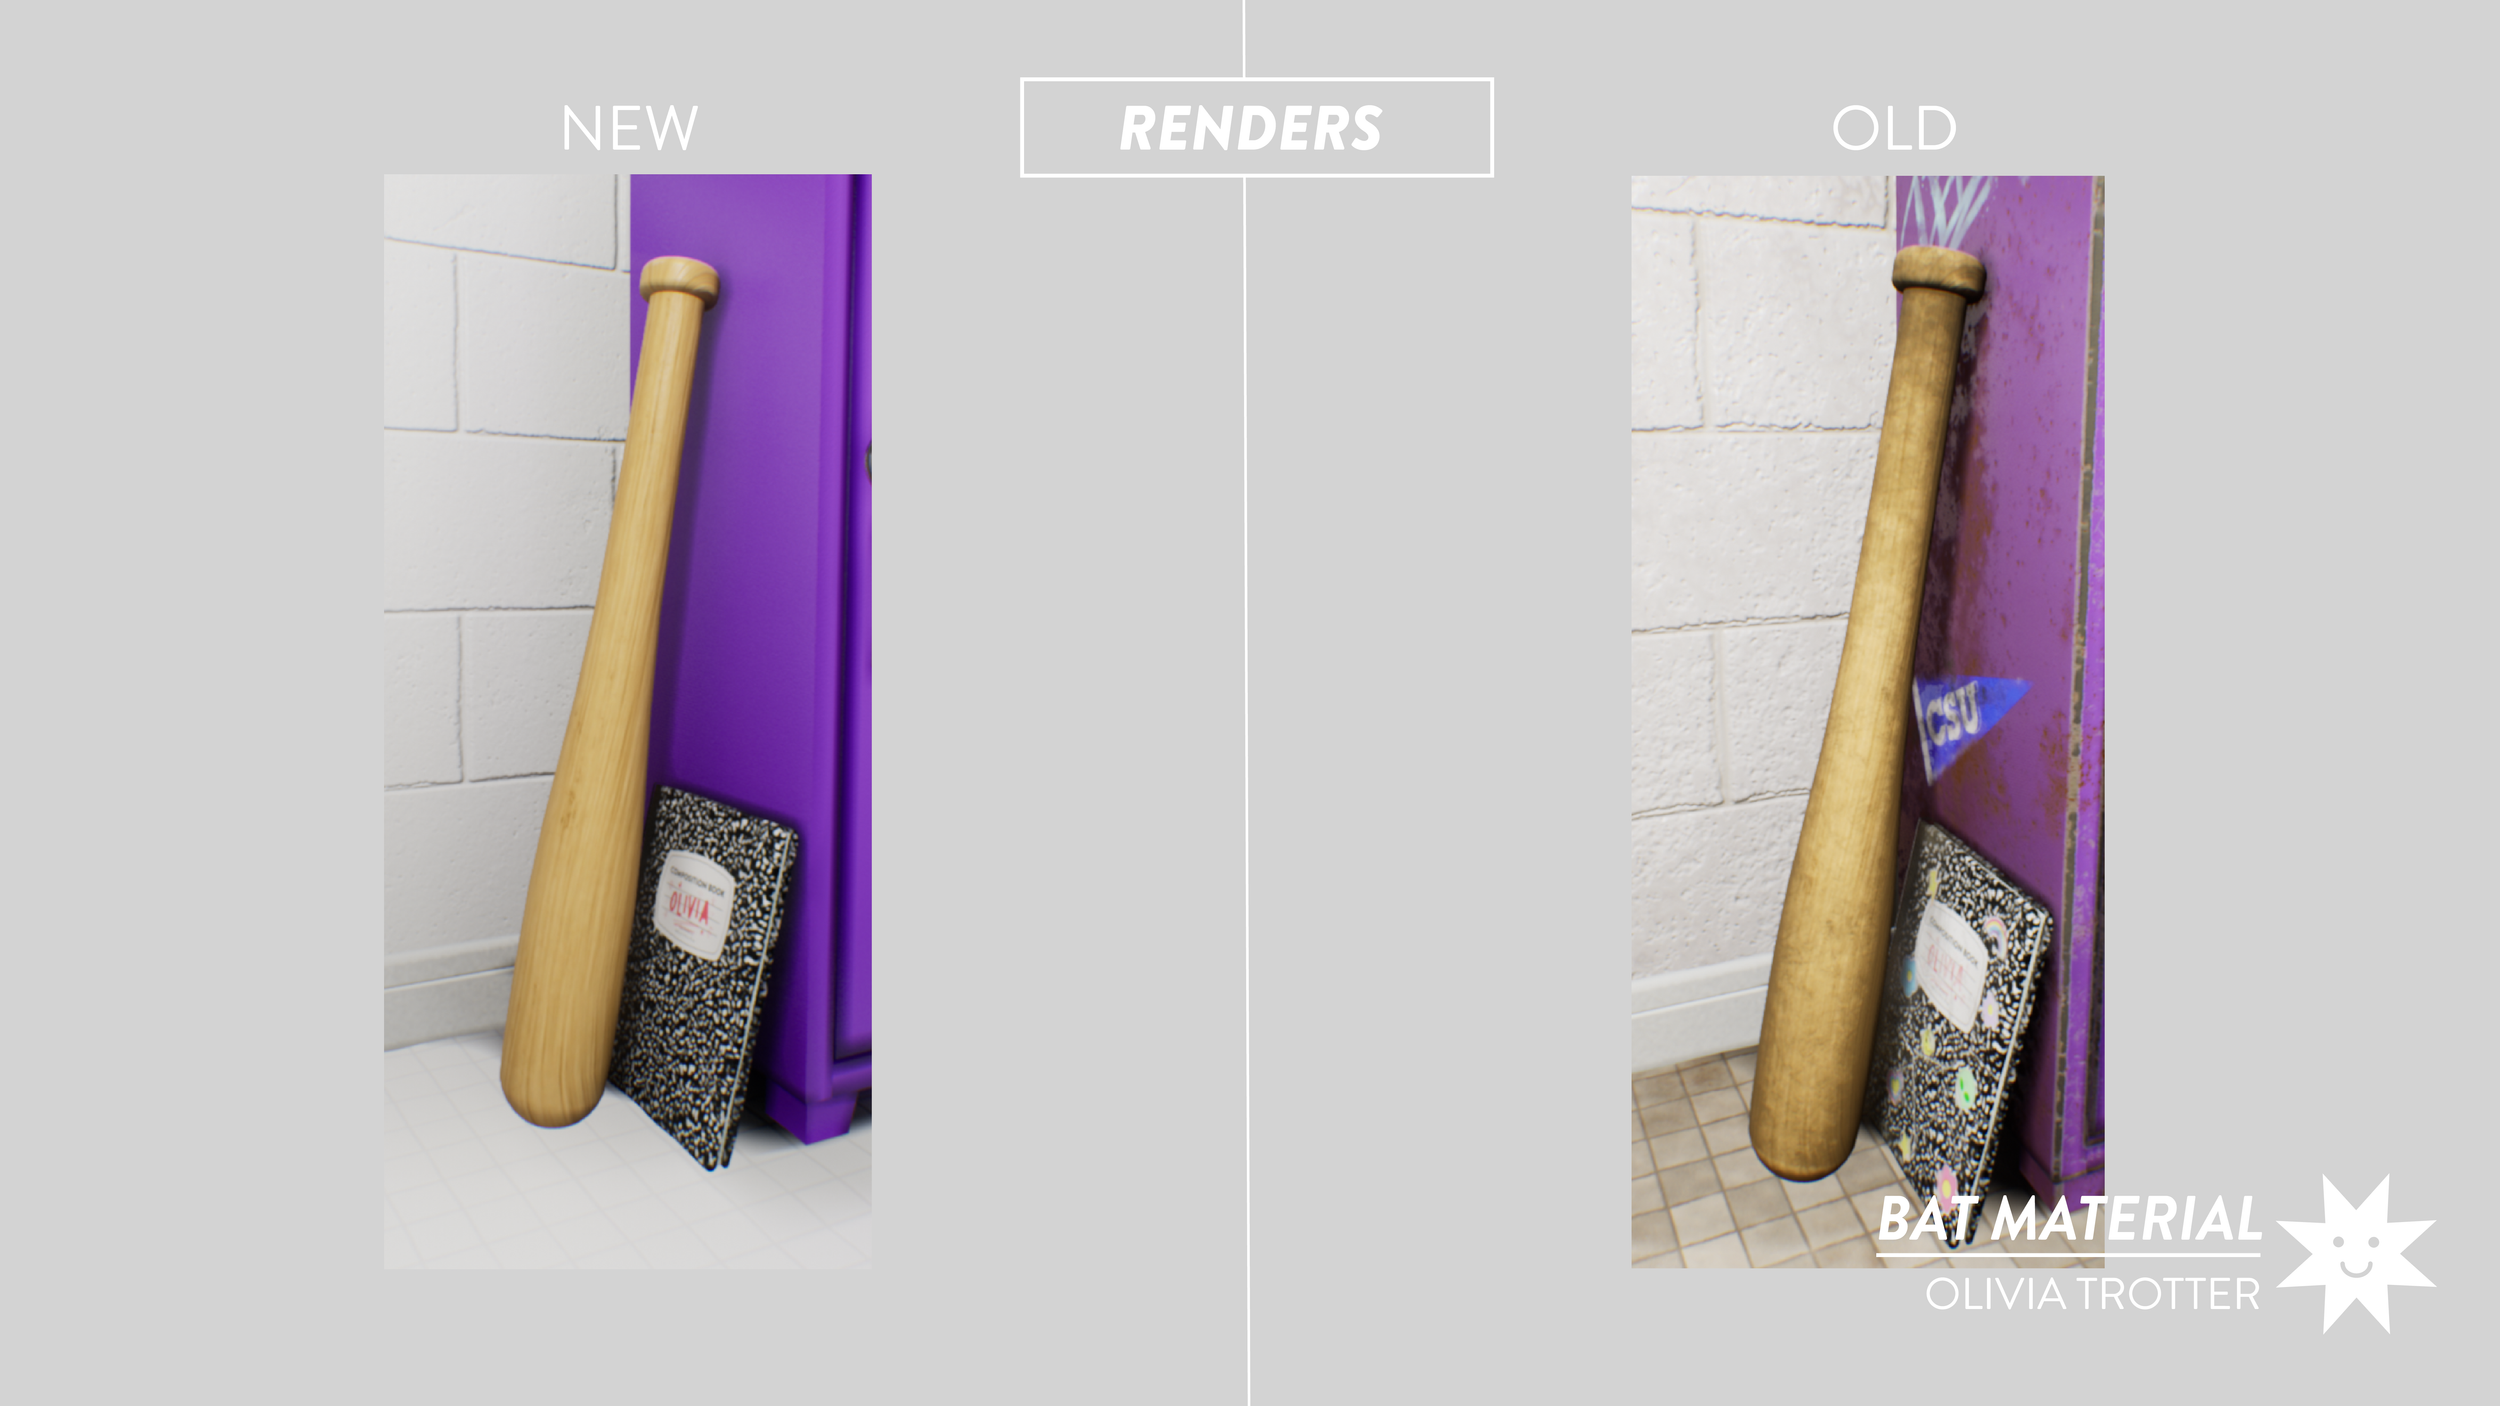
Bat Material: This material was created using an assortment of noise nodes. The base of the grain was created with anisotropic noise and knots in the wood were created by masking out, blending, and warping perlin and anisotropic noise nodes.
Composition Book Material: This material took a bit of trial and error but ultimately I ended up using a histogram scan on a small scale perlin noise to get the final effect.
Dictionary Material: A combination of a weave and noise node were used to achieve this look.
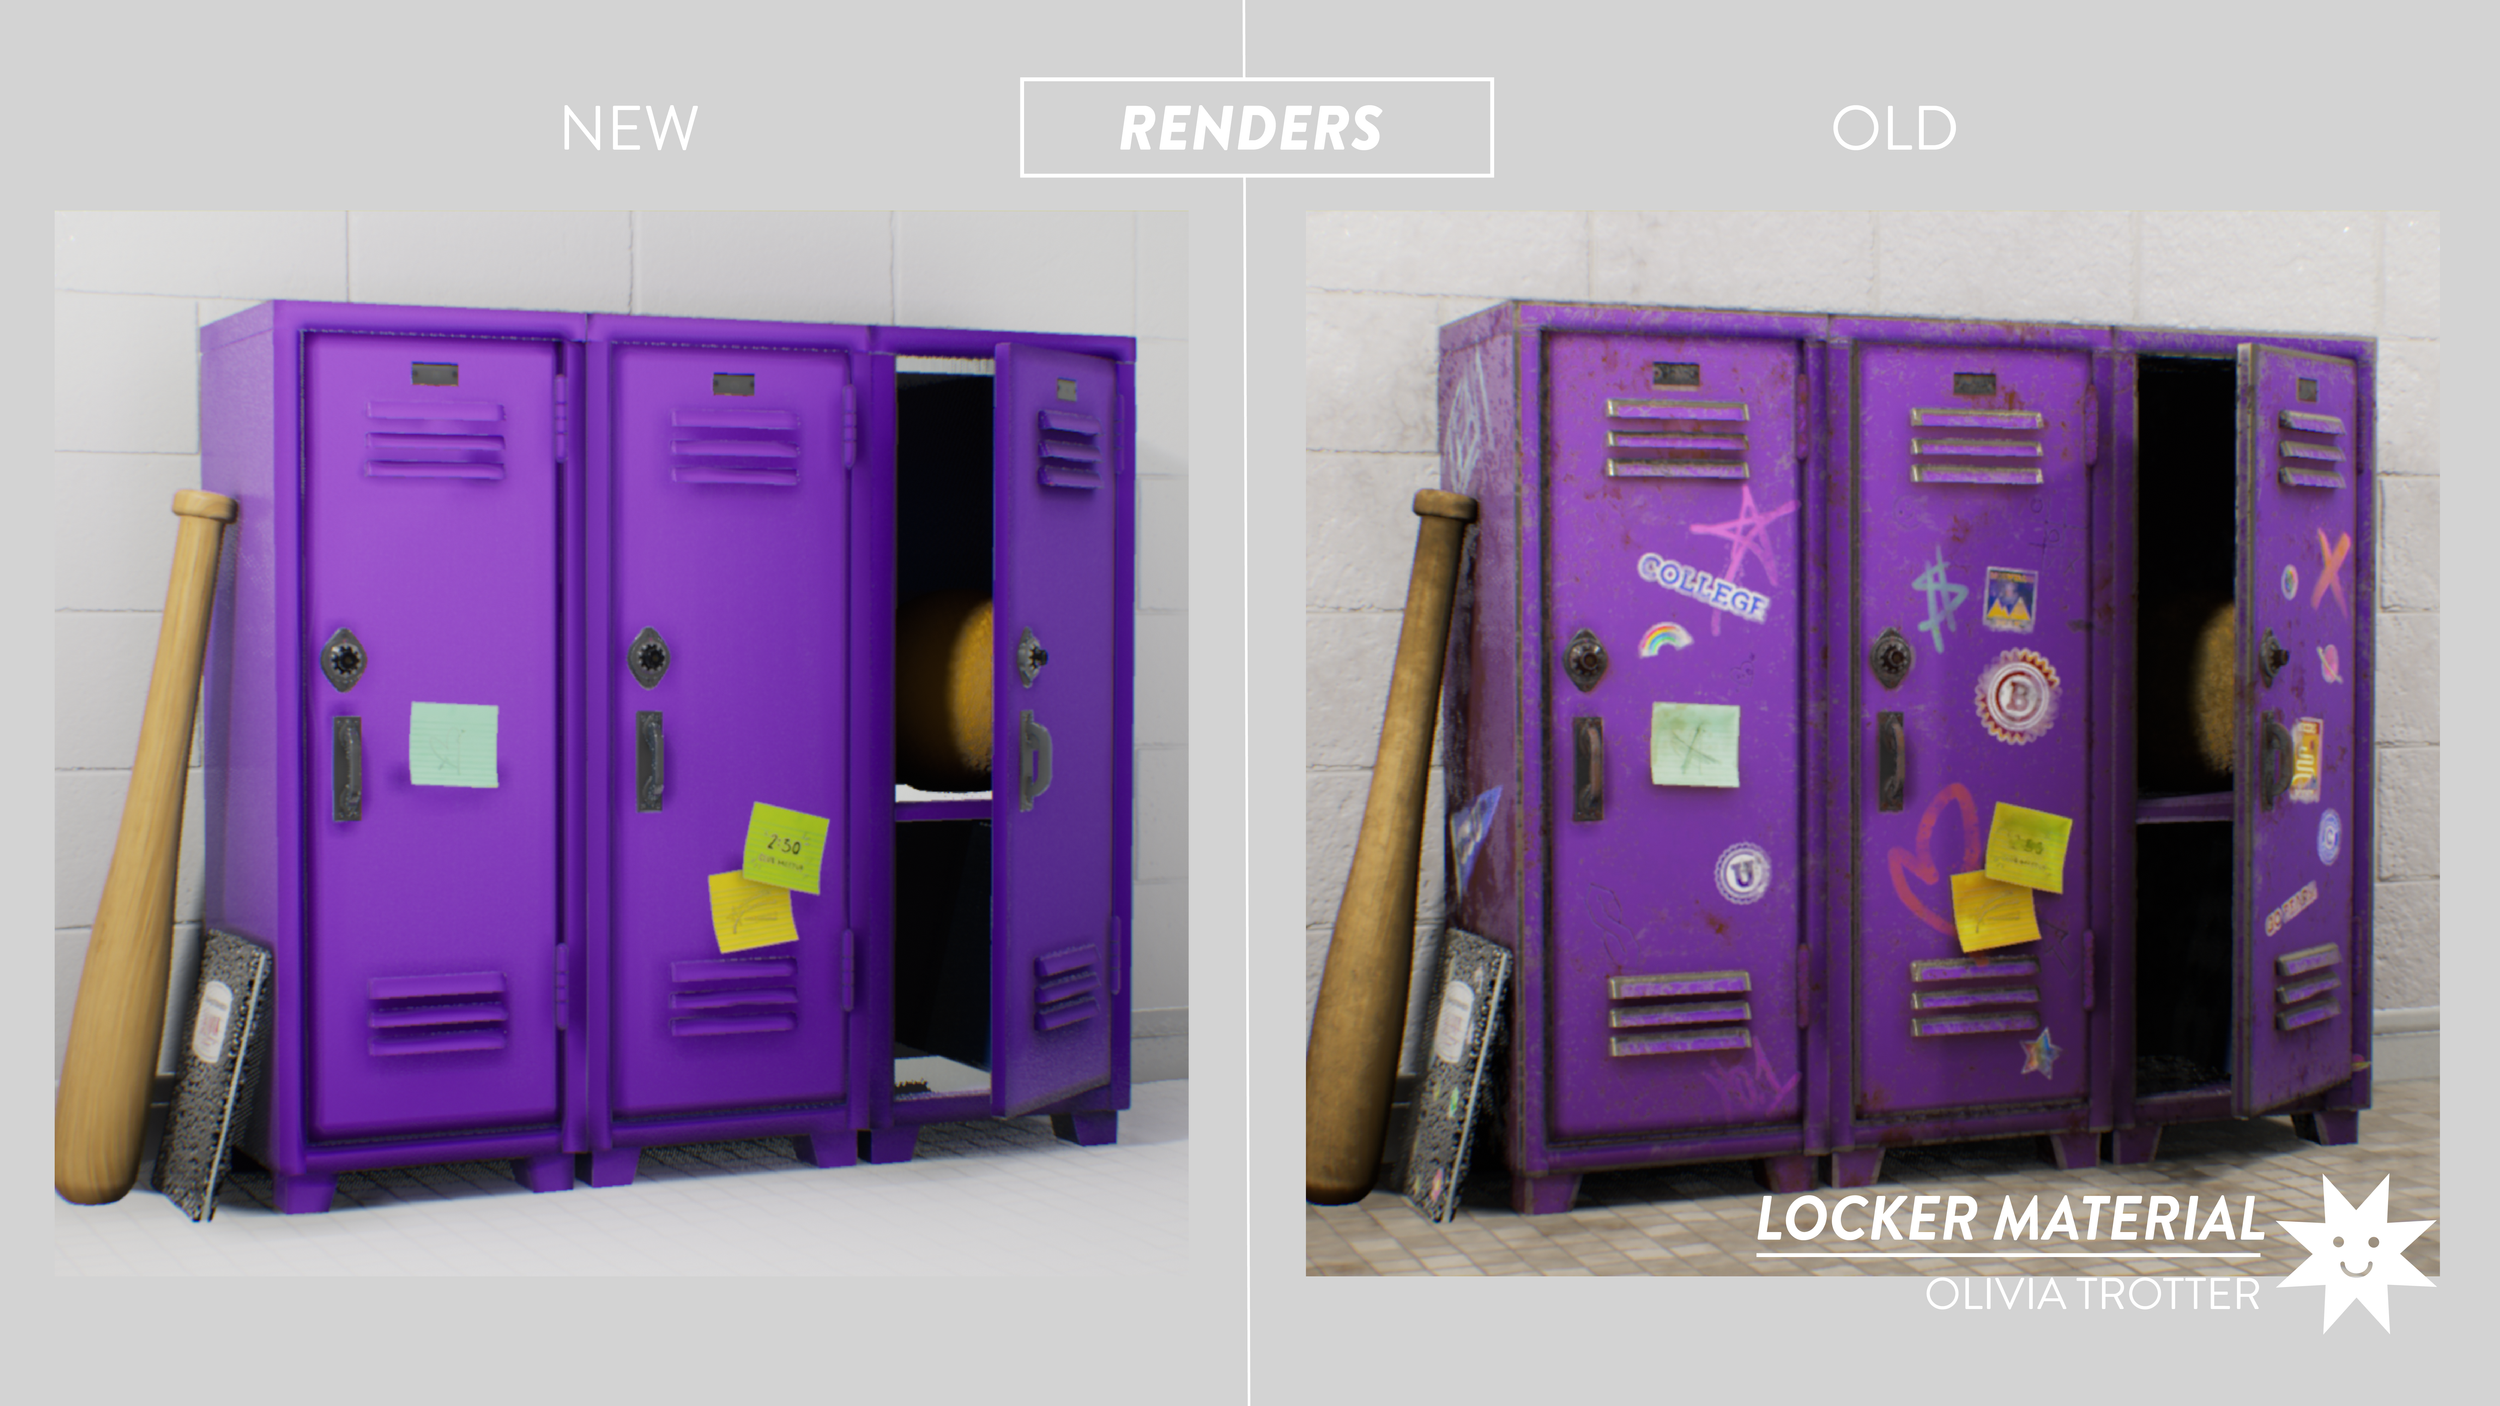
Locker Material: From a distance, lockers tend to look like they have a smooth, even surface. During my reference hunting phase, I found that up-close, most lockers actually have a bit of small raised noise in their coat of paint that diffuses their roughness. To get this subtle effect, I applied a gaussian noise to the normal and ambient occlusion maps
Hardware Metal Material: This metal was another material that simply required just a touch of noise to make it feel more believable. A combination of a cloud texture and directional noise were used to give this metal the subtle surface variation it needed.
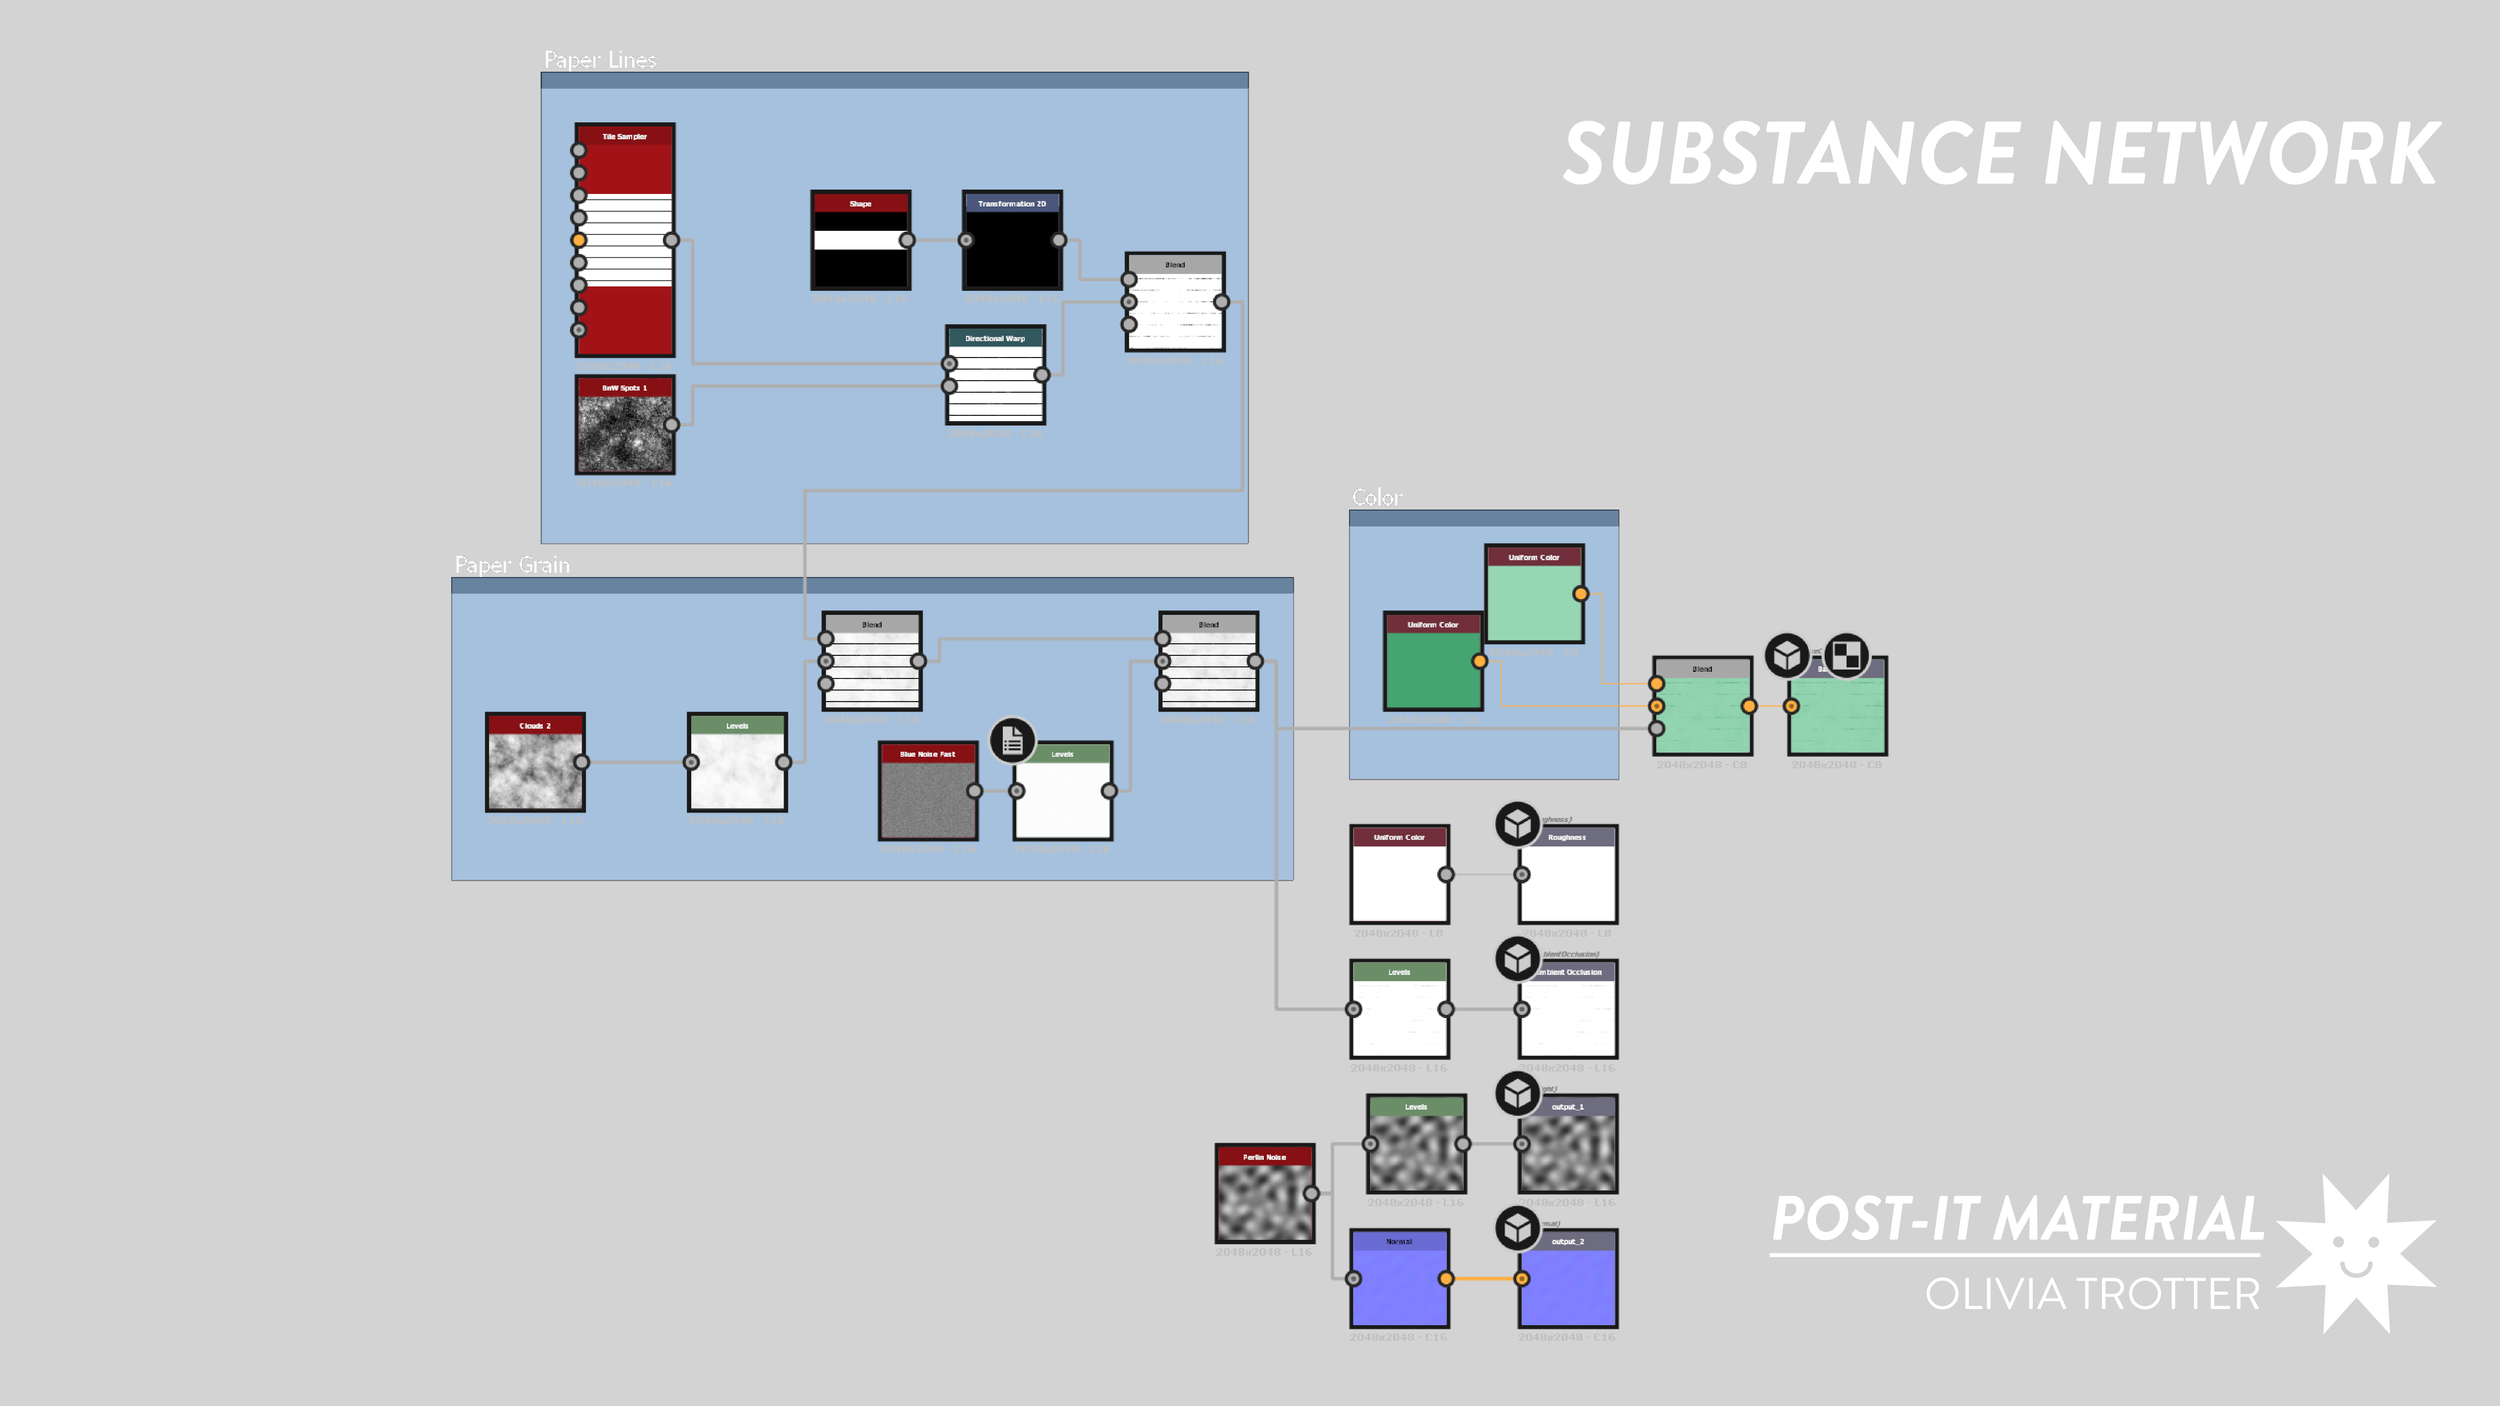
Post-It Material: This material was a combination of a tile generator to create the lines and a few noise nodes. The paper lines also had a subtle directional warp applied to them to give the illusion of slightly bleeding ink from the printing process. Adding some noise to the height helped to give give this material some imperfections and an extra touch of believability.
New Tile Material: A tile generator and noise for the grout went a long way for achieving this look. As I was finishing up my materials and beginning to test them in Substance Painter, I realized that my wall and floor geometry were so large that they were losing resolution from all my repeated UV’s. For my final render, I opted to export my Designer files as bitmaps and tile the texture in Unreal instead of Painter so I could get a higher quality output.
Old Tile Material: In order to keep the same resolution as my ‘new’ looking tile, I created my ‘old’ version in Designer (versus applying dirt and grime in Painter like I was able to do with other materials) so that I could tile my bitmap texture exports in Unreal. A lot of additional noise was added to my initial tile material to create this look, as well as a color change.
New Wall Material: This material required a tile generator for the base of the bricks. The challenging part of building this material was creating the subtle imperfections and holes in the concrete. Ultimately to get this look, I masked out some grunge maps to create holes and scratches and used some directional warping on the concrete cracks to give them some variation. Like the floors, the final application of this material took place in Unreal.
Old Wall Material: Like the floors, I also had to create the old version of this material in Unreal to get the desired resolution for my final renders. Noise and grunge were added to the color and roughness maps to make the walls feel like they had gathered dirt. More dents in the concrete were added to show its deterioration.
Material Application
Once materials were completed in Substance Designer, I imported them into Substance Painter to apply them on my models. I imported all of my models to the same Substance Painter scene so that I could get a good sense of how everything would look assembled together in my Unreal project. You can see in the images below how the quality of the resolution of the wall and floor textures dropped when applied in Painter. Otherwise, the application of my materials was a relatively easy process since none of my UVs needed to be masked out to have the materials applied to the models properly. When seeing everything together, I decided to make some color corrections to some of my materials like the locker and bat and gave my post-it notes a various assortment of colors to match my reference. These changes were easy to make because I had saved my color nodes as parameters before importing my textures to Painter. At this point, I also added details like the locker number plates, lock numbers, post-it drawings, and book labels to my scene using alphas I created in Adobe Illustrator. After those details were added, my ‘new’ materials were finished and it was time to move on to the ‘old’ versions.
Before and After Detail Application:
Locker Alpha Details:
Decal Development
No worn-down locker is complete without graffiti and campy stickers! The look of the decals that would be applied to my lockers was the first thing I started working on when beginning the ‘old’ version so that I could spend ample time tweaking their composition and placement (this was a very time consuming process!). To get the look I wanted, I created a set of colored sticker designs with matching alphas in Illustrator and applied them directly onto the locker in Painter. To grunge them up, I took a dirt brush eraser and brushed over the edges to give them a peeled look. I then went under each sticker layer with a white grunge brush to give the illusion that the sticker had been worn to the paper. For the art direction of my designs, I took a lot of inspiration from college stickers and travel stickers. I wanted them to feel like something a younger (middle-high school) student would have.
Locker Sticker Designs:
I repeated this process for the composition book but wanted to give these stickers a slightly different look. These stickers were inspired more by small sticker packs.
Composition Book Sticker Designs:
Creating Decomposition
With all of my materials, alphas, and sticker details added I could finally start grunging up the base materials on my assets. To create wear, I used several layers of dirt mask and grunge generators in Substance Painter. These masks helped to drive things like edge wear of the paint and build-up of the rust on the lockers. Some details like the spray-painted graffiti were also drawn directly on the objects during this stage. By the end of this process, each of my materials had many layers of additional detail. The image below is the material layering for the locker on the far left, a good example of how complex the layering became while creating the ‘old’ versions.
Layering Example:
Final ‘Old’ Version Substance Painter Render
Importing Assets to Unreal
After everything was completed for my ‘new’ and ‘old’ materials in Substance Painter, I exported all my maps and imported them into my Unreal project (as well as my models). In Unreal, I had quite a few adjustments to make. In addition to my problems with the wall and floor, some of my materials were showing up as having less roughness than they were supposed to. To fix these issues, I created parameter sliders in each of my materials that allowed me to adjust tiling and roughness values.
Exampling of Tiling Parameters Being Applied on Wall Material:
Example of Roughness Parameter Adjustment:
Lighting & Rendering
My final step in Unreal was to tweak my lighting and camera movements before rendering everything out. Below is my lighting and camera set up for my final scene.
Beyond just lighting, what really helped sell the scene was the adjusting my lightmass settings and adding a post-processing volume and exponential height fog to the scene. With these adjustments I was able to control my ambient occlusion and shadows and also give the scene a bit of softness through the use of the fog. Post-Processing also allowed me to make some color correction adjustments to help me add some additional grunge to the look of the renders for my ‘old’ materials.
Lightmass Settings:
Post-Process Adjustments
Exponential Height Fog:
Final Renders
After finalizing the scene, my shots were ready to be rendered out in Unreal. The cameras seen in the above section were animated and compiled in a level sequencer to assemble my shots before rendering.
Final cinematic camera renders can be found at the video at the top of the page. Below is a side-by-side comparison of renders of the ‘new’ textures and the ‘old’ textures.





Final Thoughts
This project helped me to develop a better understanding of material production and how materials interact with each other. The workflow presented in this process document can help to create man-made materials at various degrees of wear and hopefully demonstrate the steps that can be taken to achieve similar results.


